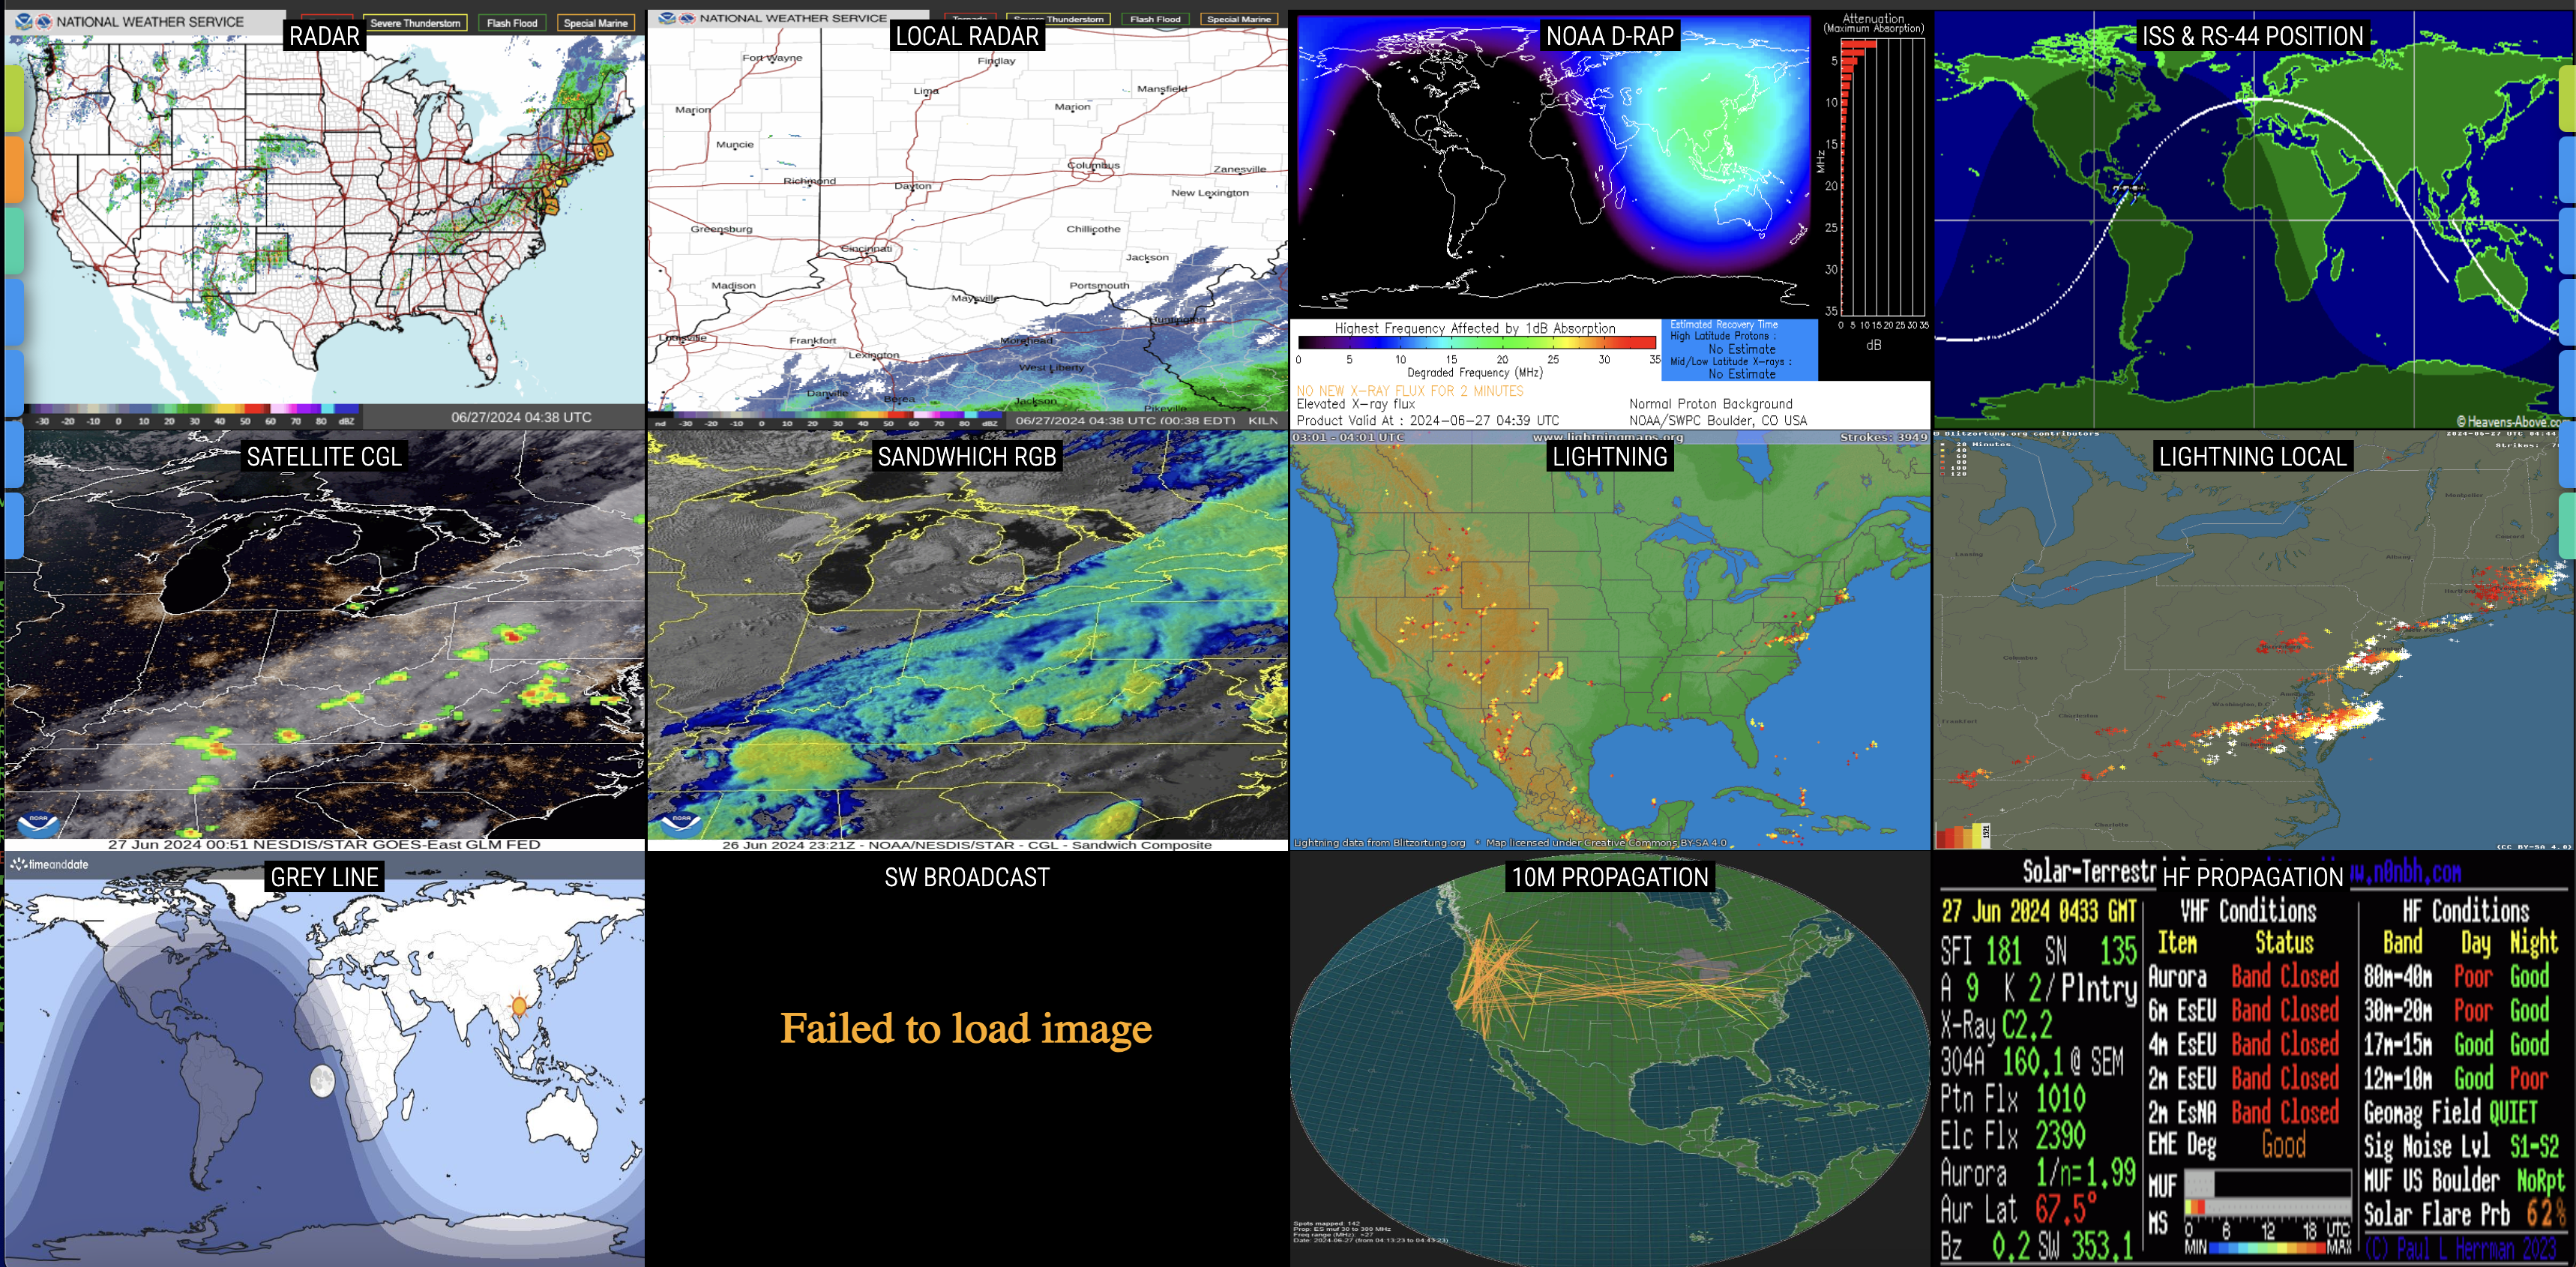
Hosting Ham Dashboard by VA3HDL with Cloudflare Pages, for Free: A Step-by-Step Guide
In this tutorial, we’ll walk through the steps of forking a specific GitHub repository, making a necessary file change, and then deploying it to Cloudflare Pages. Finally, we’ll cover how to add a custom domain to your site.
Step 1: Fork the GitHub Repository
The first step is to fork the repository, made possible by VA3HDL. In this case, we will fork the hamdashboard repository.
- Make sure you’re logged into your GitHub account.
- Visit VA3HDL/hamdashboard.
- Click the “Fork” button at the top-right corner of the page. This will create a copy of the repository under your GitHub account.

Step 2: Rename hamdash.html to index.html
For Cloudflare Pages to recognize the main file to serve, we need to rename hamdash.html to index.html.
- Navigate to your forked version of the repository.
- Locate the
hamdash.htmlfile in the repository. - Click on the file, then click the pencil icon in the top right to edit. Change the file name from
hamdash.htmltoindex.html. Commit the changes.
Step 3: Deploy to Cloudflare Pages
Next, we’ll deploy the repository to Cloudflare Pages. These steps assume you have a Cloudflare account.
- Go to Cloudflare and log in.
- In the Cloudflare dashboard, click on “Workers & Pages” in the sidebar.
- Click “Create”, select “Pages” instead of “Workers”, and then click “Connect to Git”.
- If prompted, authorize Cloudflare to access your GitHub account.
- Choose the forked
hamdashboardrepository. - Set the following configuration:
- Framework preset: None
- Build command: (Leave empty)
- Build output directory: .

Click “Save and Deploy”.
- Cloudflare Pages will now deploy your site. This may take a few minutes.
Step 4: Add a Custom Domain
Now that your site is live, let’s add a custom domain to it. These steps assume you have a custom domain and the DNS records are editable via Cloudflare.
-
In the Cloudflare Pages dashboard, click on your newly created project.
-
Click on the “Custom domains” tab.
-
Click “Set up a custom domain” and enter your domain name.

-
Cloudflare will provide you with a CNAME record. Cloudflare should add this for you automatically if you are using CLoudflare to manage DNS records. If you are using another provider, you need to add this record to your domain’s DNS settings.
- Log in to your domain registrar: Access the DNS settings for your domain.
- Add a CNAME Record: Add the CNAME record provided by Cloudflare. The exact process will vary depending on your registrar, but generally, you’ll enter the CNAME in the format
yourdomain.com -> pages.dev.
-
Once you’ve added the DNS record, return to Cloudflare Pages and click “Verify”.
Conclusion
And that’s it! You have successfully forked the hamdashboard GitHub repository and deployed it to Cloudflare Pages with a custom domain. Your site should now be live and accessible to the world.
Feel free to customize your setup further, experiment with additional features, and share your experiences to help others.
As always, if you have any questions or want to contribute to the above information, feel free to start a Discussion on GitHub, submit a GitHub PR to recommend changes/fixes in the article, or reach out to me directly at [email protected]. Finally, feel free to join my Matrix channel for W3RDW and chat with me there.
Thanks for reading!
73 from Robert, W3RDW